User Guide

A clear, step-by-step walkthrough of every tool in Smart File Organizer. Learn how each feature works and how to get the most out of it.

Organize Files
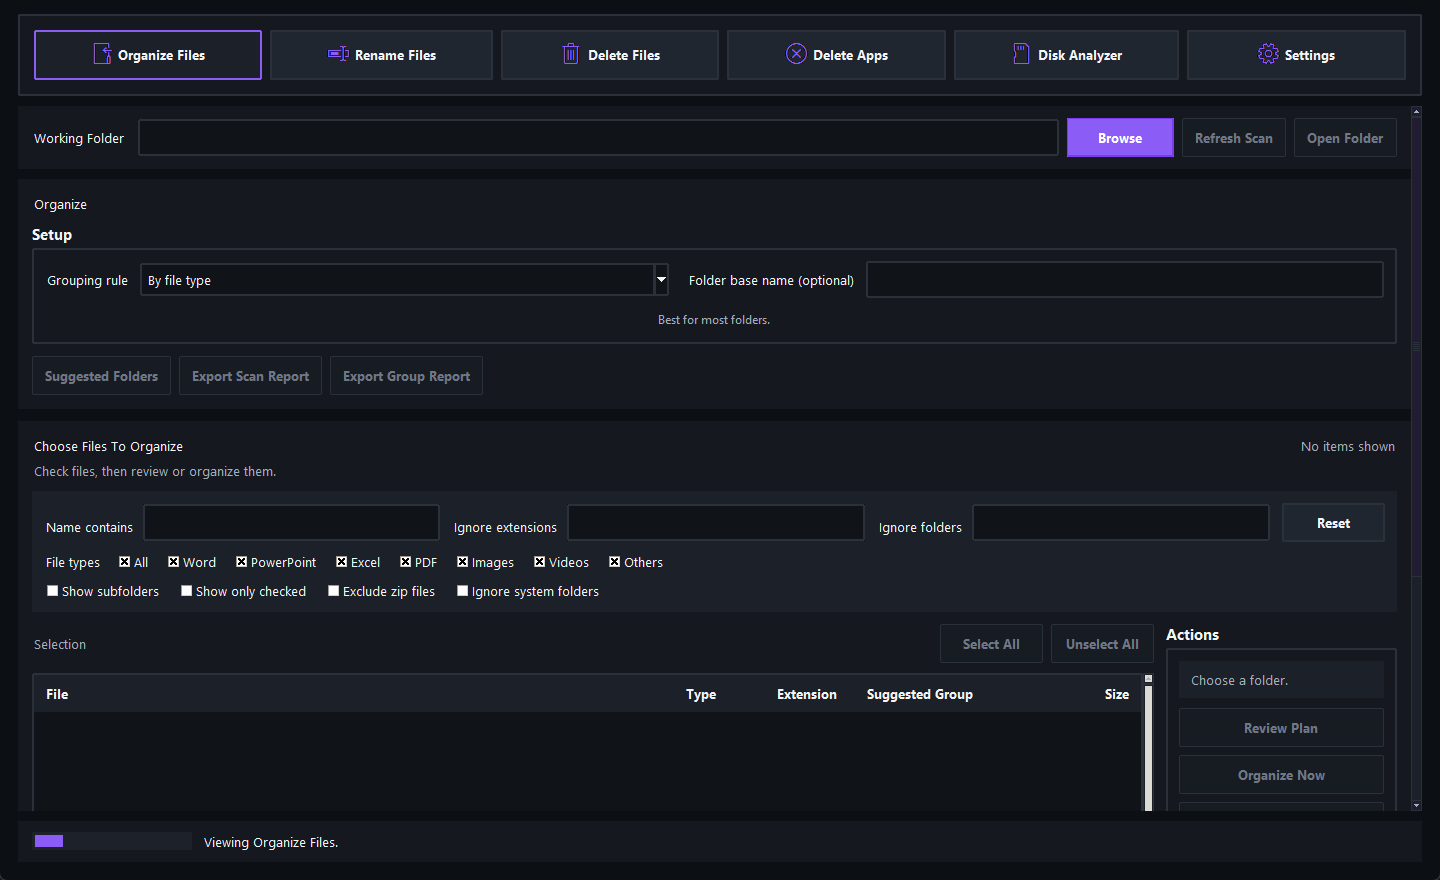
Organize Files view
01

Organize Files

The Organize section is the core of the application. It scans any folder on your computer, lists every file with its type, size, and location, and helps you sort them into clean, organized groups — all with a full preview before anything moves.

How to use it

  1. Click Browse and select a folder. The app scans it automatically.
  2. Use the filters to narrow what you see: file type, name search, or excluded extensions and folders.
  3. Choose a Grouping rule from the dropdown: by file type, by extension, by naming pattern, by folder structure, or by date modified.
  4. Click Suggested Folders to preview how the app would organize your files. You can rename any of the suggested groups.
  5. Click Review Plan to see where each file will move, showing the old path and the new path side by side.
  6. Click Organize Now to apply. Folders are created automatically and name collisions are handled safely.

Example

Your Downloads folder has 200 files — PDFs, images, Word documents, installers, and zip files all mixed together. You open it in the app, choose "By file type" grouping, and in one click the app sorts everything into Documents, Images, Videos, and Other folders. Before anything moves, you see the full preview and confirm.

Tip: If you make a mistake, use the Undo button to restore all files to their original locations from the last operation.
Rename Files
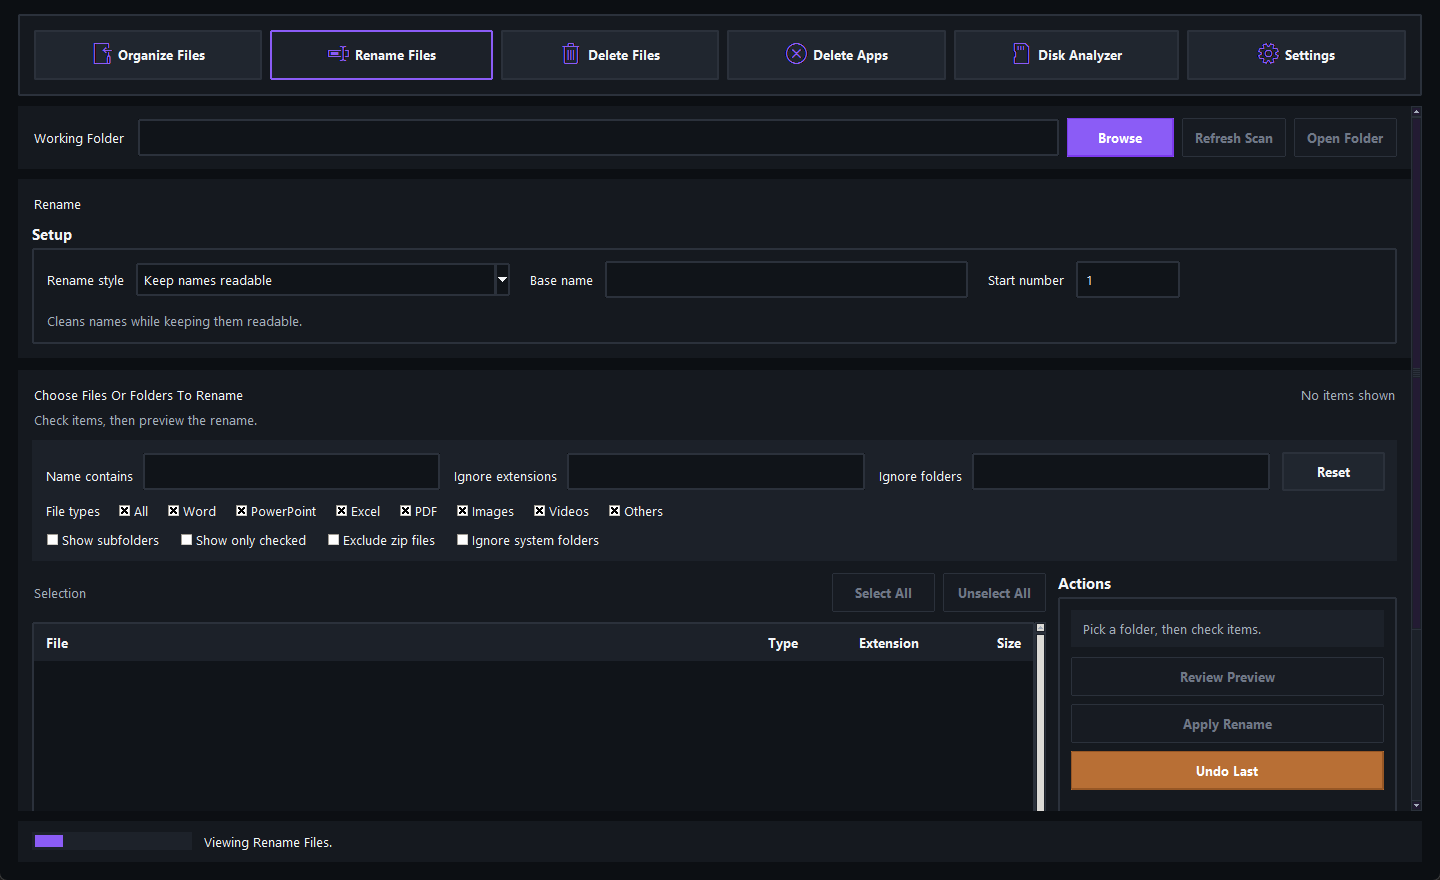
Rename Files view
02

Rename Files

The Rename section lets you fix messy, inconsistent file names across dozens or hundreds of files at once. Instead of renaming files one by one, you select a rename style, configure it, and apply it in bulk — with a full preview of every change before anything is renamed.

How to use it

  1. Browse to a folder and let the scan complete.
  2. Check the files you want to rename using the checkboxes.
  3. Choose a Rename style from the dropdown:
    • Keep names readable cleans up underscores, extra spaces, and odd formatting while keeping the original name recognizable.
    • Course code first detects course codes like "CSIT 206" and moves them to the front of the file name.
    • Custom prefix replaces all names with a base name you choose, plus sequential numbering.
  4. Optionally set a Base name and Start number for custom prefix mode.
  5. Click Review Preview to see every old name next to its new name.
  6. Click Apply Rename to rename the files.

Example

You downloaded 40 lecture slides named things like "Lecture_03__CSIT206_final (1).pptx". You select them all, choose "Course code first" rename style, and the app renames them to clean names like "CSIT 206 — Lecture 03.pptx". You see the full before-and-after preview, confirm, and it is done in seconds.

Delete Files
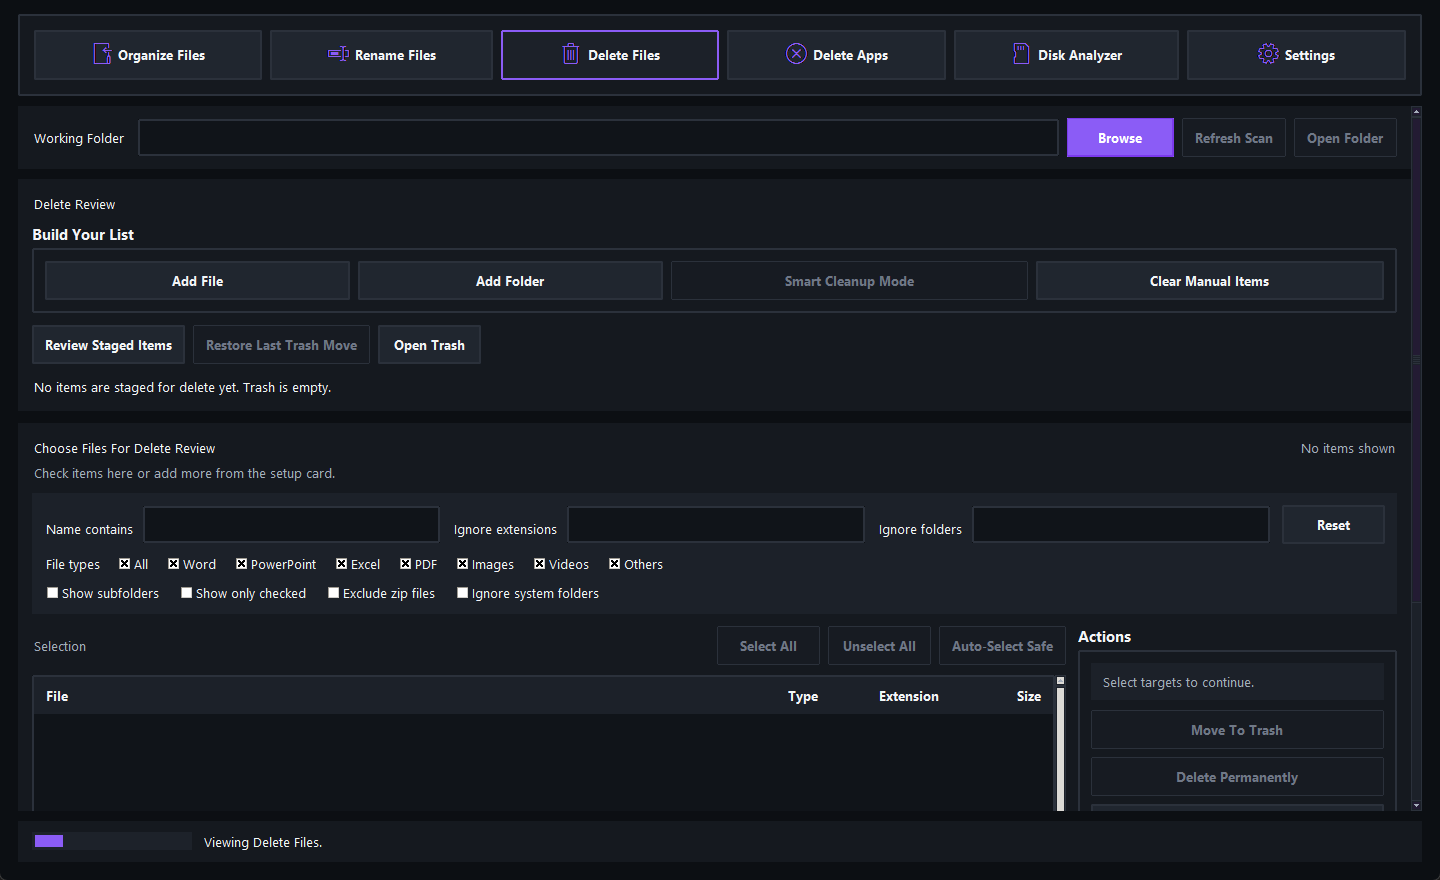
Delete Files view
03

Delete Files

The Delete section helps you safely remove files you no longer need. It includes a managed Trash system so deleted files can be restored, and a duplicate detection tool that finds files with identical contents using SHA-256 hashing — regardless of what the files are named.

How to use it

  1. Browse to a folder and let the scan complete.
  2. Check the files you want to remove using the checkboxes.
  3. Choose how to delete: move to the app's Trash (recoverable), send to the Windows Recycle Bin, or permanently delete.
  4. Confirm your selection. The app never deletes anything without your explicit approval.
  5. To find duplicates, click Find Duplicates. The app scans file contents using hashing to identify exact copies, then groups them for your review.

Example

Over the past year you have downloaded the same PDF attachment from email five times. The files have different names like "report.pdf", "report (1).pdf", and "report_final.pdf" — but the content is identical. The duplicate finder detects all five, groups them, and lets you decide which copies to keep and which to remove.

Tip: The app never deletes duplicates automatically. It shows you the groups and you choose what to do with them. Locked or in-use files are skipped gracefully with a warning instead of causing an error.
Delete Apps
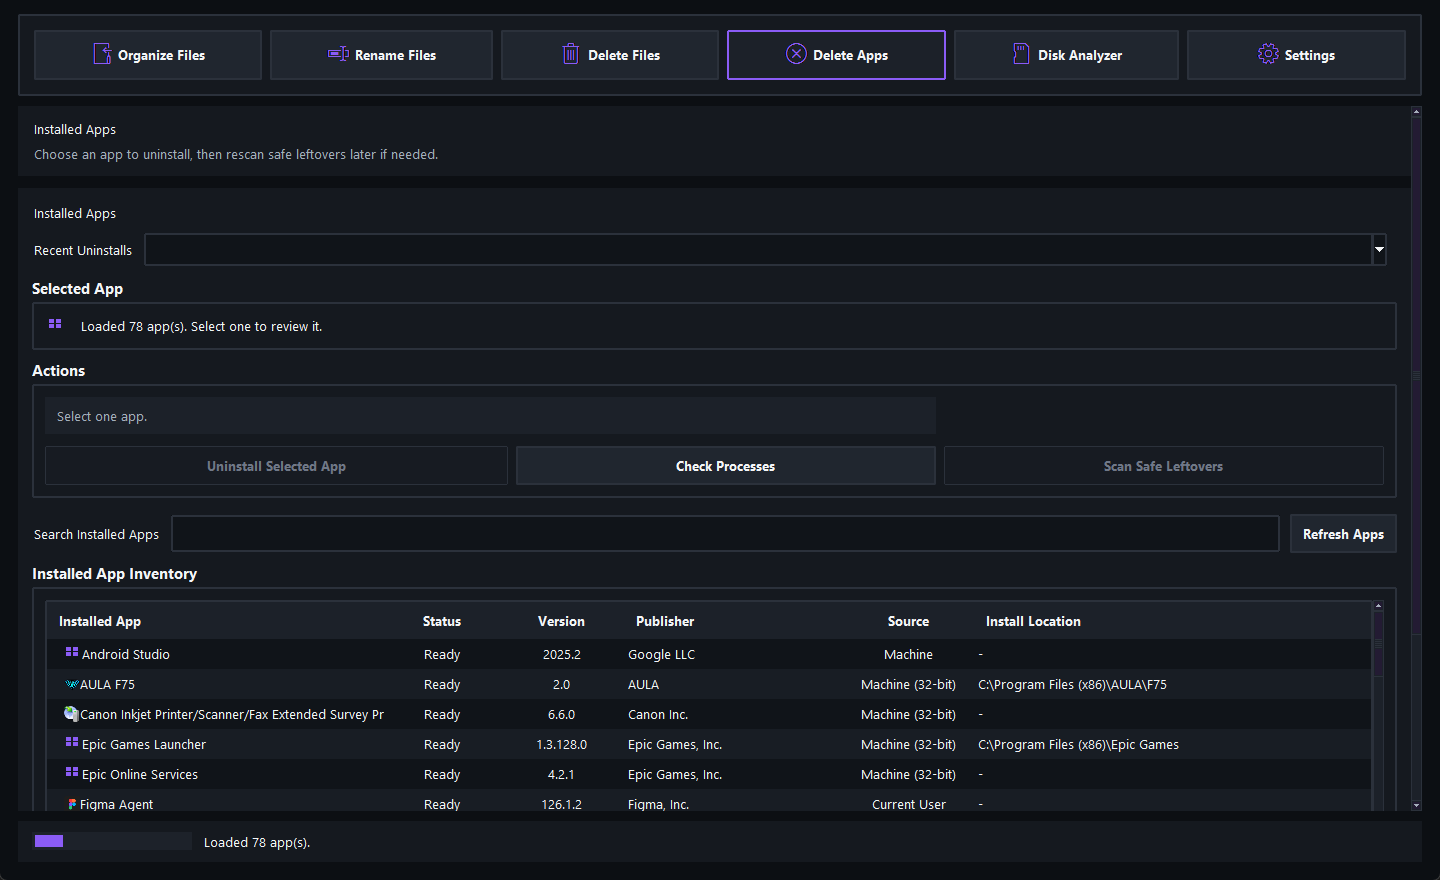
Delete Apps view
04

Delete Apps

The Delete Apps section is a more advanced uninstall and cleanup tool. It gives you a full inventory of installed applications and helps you forcibly remove software that does not always uninstall cleanly through the normal Windows process. After removal, it scans for leftover files that the standard uninstaller missed.

How to use it

  1. The app loads your installed applications automatically when you open this section. Each entry shows the application name, version, publisher, source, and install location.
  2. Use the search bar to find a specific application by name.
  3. Select an application from the list to see its details and available actions.
  4. Click Uninstall Selected App to trigger the removal. The app can help force the uninstall process when the standard method fails or gets stuck.
  5. Use Check Processes to see if the application is still running in the background, which can block a clean uninstall.
  6. After the uninstall finishes, click Scan Safe Leftovers to search for remaining files, cache folders, configuration data, or other remnants the uninstaller did not remove.
  7. Review the results and decide what to clean up.

Example

You try to uninstall a video editing application through the normal Windows "Add or Remove Programs" method, but the uninstaller throws an error or hangs. You open Smart File Organizer, find the application in the list, and force the uninstall. Afterward, the leftover scanner finds 1.8 GB of cache files, project templates, and configuration folders still sitting in AppData and ProgramData. You review them and clean up what you no longer need.

When is this useful?

In many cases, the standard Windows uninstall process works fine and removes the application without issues. But not always. Some applications resist removal, throw errors during uninstall, leave background processes running that block the cleanup, or simply fail to remove all of their files. Larger applications, creative software, development tools, and trial software are common offenders.

This feature helps in those situations by giving you a way to force the uninstall more effectively and then scan for whatever was left behind. The leftover scan has three levels: Safe, Medium, and Full. The Safe level checks well-known locations like AppData and ProgramData and is appropriate for most situations. Medium and Full cast a wider net for deeply embedded remnants. You always see exactly what was found and you decide what to remove. The tool never deletes anything on its own.

Disk Analyzer
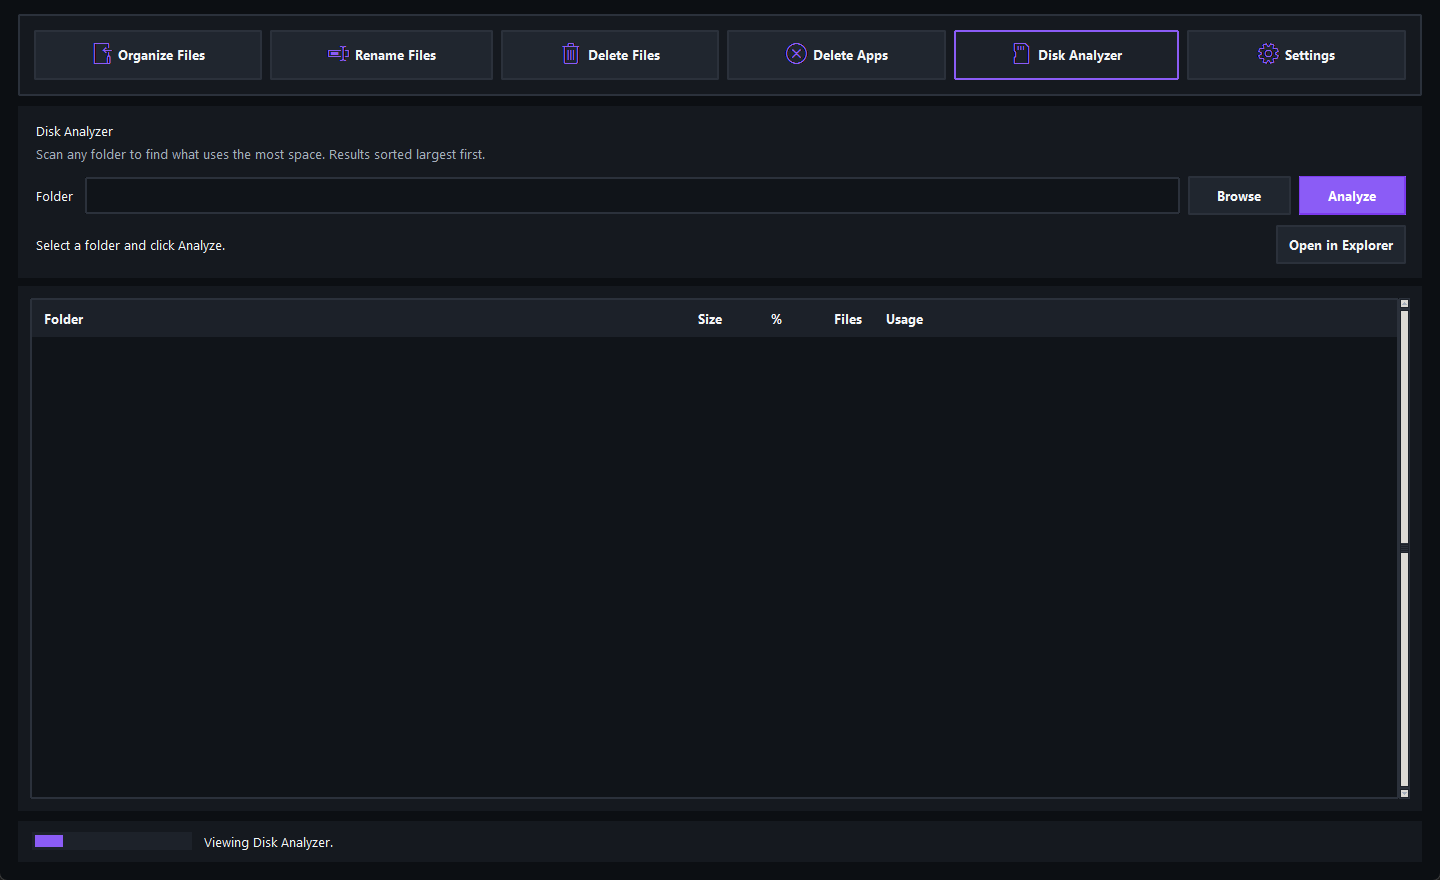
Disk Analyzer view
05

Disk Analyzer

The Disk Analyzer scans any folder or drive and shows you exactly what is taking up space — sorted by size from largest to smallest. Instead of guessing where your storage went, you get a clear, actionable breakdown.

How to use it

  1. Click Browse and select a folder or drive to analyze.
  2. Click Analyze to start the scan. The app calculates the size of every subfolder.
  3. Results are displayed in a table sorted by size, with the percentage of total space each folder uses and a visual usage bar.
  4. Click Open in Explorer to open the folder directly in Windows Explorer so you can inspect or clean it up.

Example

Your C: drive is nearly full and you are not sure why. You point the Disk Analyzer at "C:\Users\YourName" and within seconds you can see that the AppData folder is using 34 GB, your Downloads folder has 12 GB of old files, and a forgotten game backup folder is sitting at 28 GB. Now you know exactly where to free up space.

Tip: Start with a broad scan (like your entire user folder) to identify the biggest consumers, then drill into specific folders to find the files you can remove.
Settings
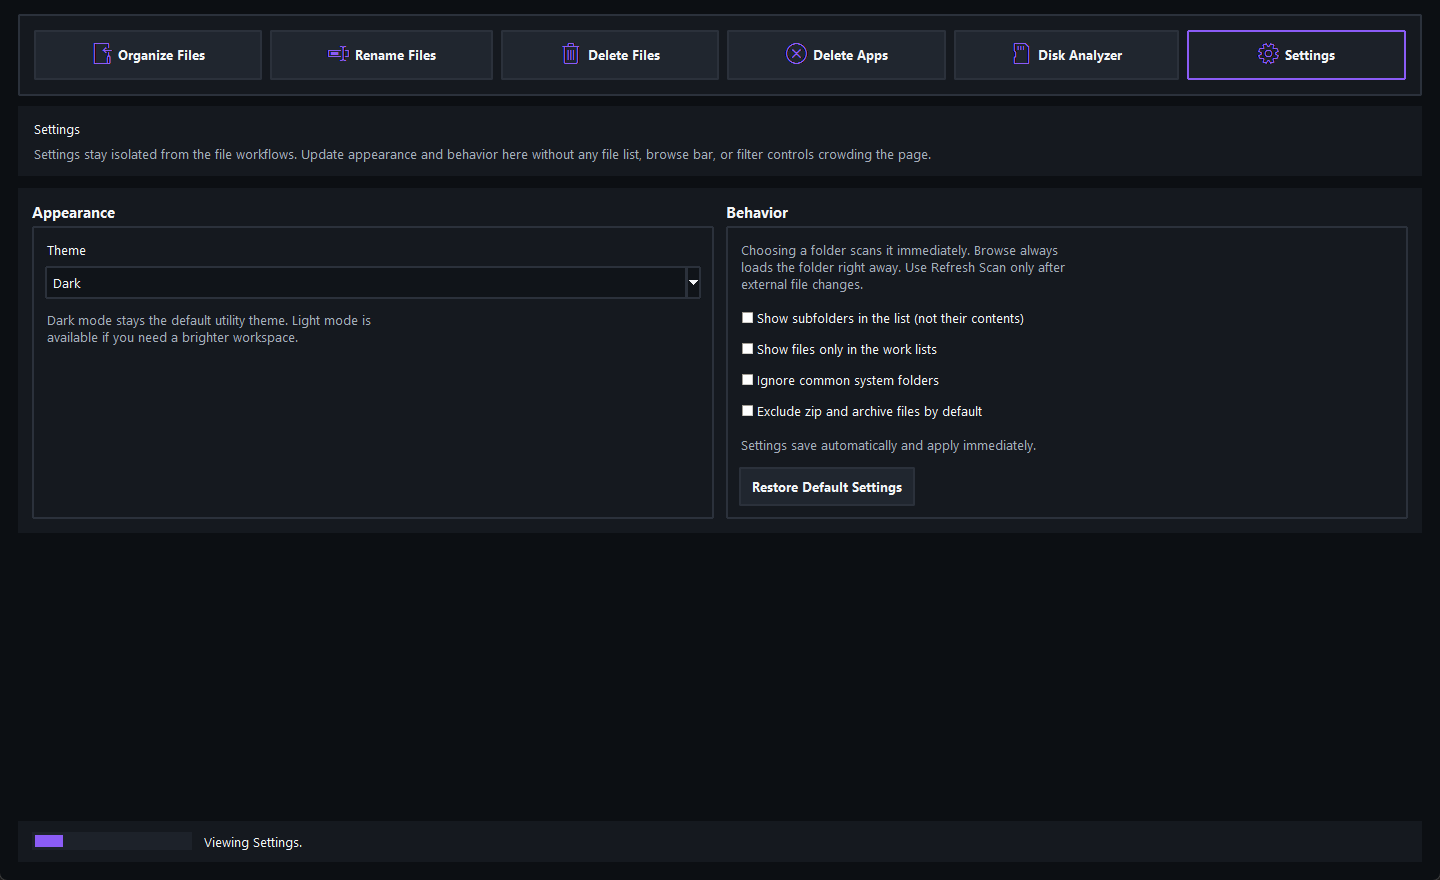
Settings view
06

Settings

The Settings section lets you customize the appearance and default behavior of the application. Changes are saved automatically and applied immediately — no restart required.

Available options

  • Theme — Switch between Dark and Light mode. Dark mode is the default utility theme; Light mode provides a brighter workspace if you prefer it.
  • Show subfolders in the list — When enabled, subfolder names appear in the file list alongside files. Useful for seeing the full folder structure.
  • Show files only — Hides subfolders from the work lists so you only see files.
  • Ignore common system folders — Automatically skips folders like "node_modules", ".git", and other system directories that you typically do not want to organize.
  • Exclude zip and archive files by default — Keeps zip files out of the scan results unless you specifically include them.
  • Restore Default Settings — Resets everything back to the original defaults with one click.
Tip: Settings are isolated from the file workflows. You can adjust them at any time without affecting an ongoing scan or operation.